
In this tutorial I will show you how easy it is to extend the HTML language with custom tags. The custom tags can be used to implement various behaviors, so they are a very convenient way to write less code and keep your HTML documents simpler.
What Is a Custom HTML Tag?
With HTML you use the tag, for example, to show bold text. If you need a list, then you use the
- tag with its child tag
- One folder to hold the project files; let’s call this folder
gravatar-custom-tag. - One HTML file
index.htmlinside thegravatar-custom-tagfolder. This file will contain the HTML code. - One JS file
codingdude-gravatar.jsinside thegravatar-custom-tagfolder. This file will contain JavaScript code implementing the custom tag.
for each list item. Tags are interpreted by browsers and, together with CSS, determine how the content of a webpage is displayed and also how parts of the content behave.
Sometimes, just using one HTML tag is not enough for the functionality needed in web applications. Usually this is solved by using multiple HTML tags together with JavaScript and CSS, but this solution is not so elegant.
A more elegant solution would be to use a custom tag—an identifier enclosed in <> which is interpreted by the browser to render our intended functionality. As with regular HTML tags, we should be able to use a custom tag multiple times in a page, and also we should be able to have tag attributes and sub-tags to aid the functionality of the custom tag. So, let’s see an example!
Example #1: Creating a Gravatar Custom HTML Tag
Let’s create a custom tag that will display the Gravatar picture for a certain email address. We will call this tag email.
You can name your custom tags anything you want, but one thing to notice is that in this example the custom tag name starts with codingdude-. It’s best practice to use prefixes like this for your custom tags in order to avoid name conflicts with other custom tags. Also, it’s obviously a good idea not to use tag names that are already defined by HTML.
To implement and test our tag, we will need to create a few things:
Let’s edit the index.html file and make its content look like this:
This is my Gravatar picture:
If we load index.html in the browser now, the result is not that impressive because we have yet to implement the code for our custom tag:
![]()
One thing to notice is that the browser is very forgiving, so you can have unknown tags in a document and the browser will just ignore them. To have our custom tag actually display the Gravatar picture for my email, we have to first understand how Gravatar works.
Gravatar works by translating an email address to a URL of a PNG image that the user has selected. The translation is made by calculating the MD5 hash of the email address. The Gravatar image URL looks like this: http://www.gravatar.com/avatar/EMAIL_MD5_HASH.png. So first we need a function to calculate the MD5 hash from a string. For this we will use an open-source library which we will add to the index.html file like this:
This is my Gravatar picture:
Now let’s move on to the implementation of the custom tag. We will need to implement the code that first identifies our custom tag in the document, and then we need to implement the functionality of our custom tag. This will all go in our codingdude-gravatar.js file and will look like this:
function customTag(tagName,fn){
document.createElement(tagName);
//find all the tags occurrences (instances) in the document
var tagInstances = document.getElementsByTagName(tagName);
//for each occurrence run the associated function
for ( var i = 0; i < tagInstances.length; i++) {
fn(tagInstances[i]);
}
}
function codingdudeGravatar(element){
//code for rendering the element goes here
if (element.attributes.email){
//get the email address from the element's email attribute
var email = element.attributes.email.value;
var gravatar = "http://www.gravatar.com/avatar/"+md5(email)+".png";
element.innerHTML = " ";
}
}
customTag("codingdude-gravatar",codingdudeGravatar);
";
}
}
customTag("codingdude-gravatar",codingdudeGravatar);
Looking at the code, we see the function customTag() that finds occurrences of a custom tag by name (the tagName parameter) and executes the functionality associated with that custom tag (via the fn parameter).
The document.createElement(tagName) call is necessary for some browsers (IE in particular) to inform the browser that we will be using a custom tag with the name tagName, otherwise the tag might not work.
The fn parameter is the function that implements what the custom tag is supposed to do. In our case, fn is codingdudeGravatar(). This function takes in as a parameter a reference to the custom tag element. If the custom tag has an attribute called email then it will pass that value to the md5() function from our open-source library. The result is then used to compose the URL of the Gravatar image, which is added via an
The last line of the script calls the customTag() function with the name of the custom tag and its associated implementation function. The custom tag function can be reused for any type of custom tag; you will only have to implement the function that does what you need.
Now, if we load our index.html file in a browser, we will see the Gravatar for my email:
Example #2: Advanced Custom HTML Tag for Drawing a Pie Chart
In our previous example, we saw a very simple custom HTML tag implementation. You can use the same approach to implement any custom tag you want.
Let’s see how to implement a more advanced custom tag, one that we can use to draw a pie chart. Let’s create the files necessary for this custom tag:
- Create a folder and name it
piechart-custom-tag. This will be our project folder. - Inside the
piechart-custom-tagfolder, create an HTML file and name itindex.html. This file will contain the HTML code. - Also create a JavaScript file
codingdude-piechart.jswhich will contain the implementation of our custom tag.
Custom tags are very often used as wrappers for various functionalities. In our case, we will use the
So edit the codingdude-piechart.js file and add the following functions from the tutorial:
drawLine()drawArc()-
drawPieSlice() Piechart()
Now let’s edit the file index.html and place the custom tag for drawing the pie chart like this:
      10
      14
      2
      12
The intention here is to set the width and height of the pie chart using the attributes width and height. The colors attribute sets the colors used for the pie chart’s slices.
As mentioned before, this custom tag is a bit more complex as we will want to use sub-tags for this custom tag. We want to use the
Edit the file codingdude-piechart.js and, after the functions taken from the pie chart tutorial, place the following code:
//here you should add the function from the tutorial
//How to Draw Charts Using JavaScript and HTML5 Canvas
//...
function customTag(tagName,fn){
document.createElement(tagName);
//find all the tags occurrences (instances) in the document
var tagInstances = document.getElementsByTagName(tagName);
//for each occurrence run the associated function
for ( var i = 0; i < tagInstances.length; i++) {
fn(tagInstances[i]);
}
}
function PiechartTag(element){
//add the canvas where to draw the piechart
var canvas = document.createElement("canvas");
//get the width and height from the custom tag attributes
canvas.width = element.attributes.width.value;
canvas.height = element.attributes.height.value;
element.appendChild(canvas);
//get the colors for the slices from the custom tag attribute
var colors = element.attributes.colors.value.split(",");
//load the chart data from the sub-tags
var chartData = {};
var chartDataElements = element.querySelectorAll("codingdude-data");
for (var i=0;i
The customTag() function is the same as the one used in Example #1. The implementation of the PiechartTag() function. This function takes care of the following aspects:
- It creates the
- It looks for the
colors attribute of the element and transforms it into an array of colors used for the pie chart slices.
- It loads the
- Lastly, we call the
Piechart() constructor with the options required and then call the draw() function to draw the pie chart.
If you load index.html, you can see that the custom tag is rendered as a pie chart and should look like this:

And there it is, a beautiful pie chart. Changing the
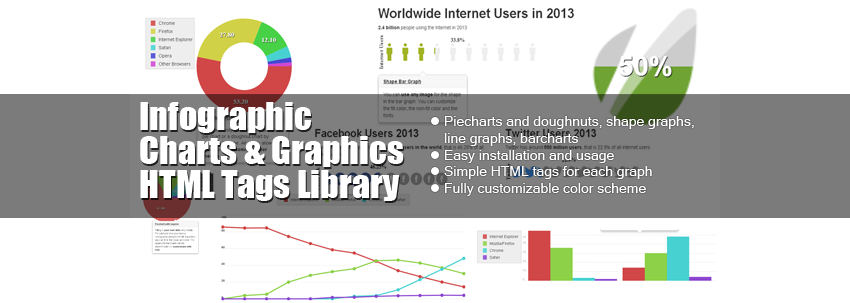
Charts library from CodeCanyon The library contains custom tags not only for pie charts, but also for line charts, bar charts, and other types of charts.
Final Thoughts
In this tutorial, we have seen two examples of how to create custom HTML tags for two different functionalities. Using the customTag() function, you can easily develop your own custom tags.
If you enjoyed this tutorial, we also have a wide variety of other tutorials on HTML5 and related technologies, so don't hesitate to check them out, as well.


