

If you are developing an Android application that needs to interact with your back-end server, it is important that you take steps to defend it against bots—automated scripts that try to pass for human. Otherwise, your server stands a very real chance of being overrun by them.
CAPTCHAs, short for Completely Automated Public Turing tests for telling Computers and Humans Apart, are currently the most effective defense against bots. As you might already know, they are usually image, voice, or common sense-based tests that are easy for humans, but extremely hard for computers.
In this tutorial, I’ll show you how to use the newly released SafetyNet reCAPTCHA API to add CAPTCHAs to your Android apps.
Prerequisites
To be able to follow this tutorial, you’ll need the following:
- Android Studio 3.0 Canary 4 or higher
- a device or emulator running Android 4.4 or higher
- Node.js 8.1.3 or higher
1. Project Setup
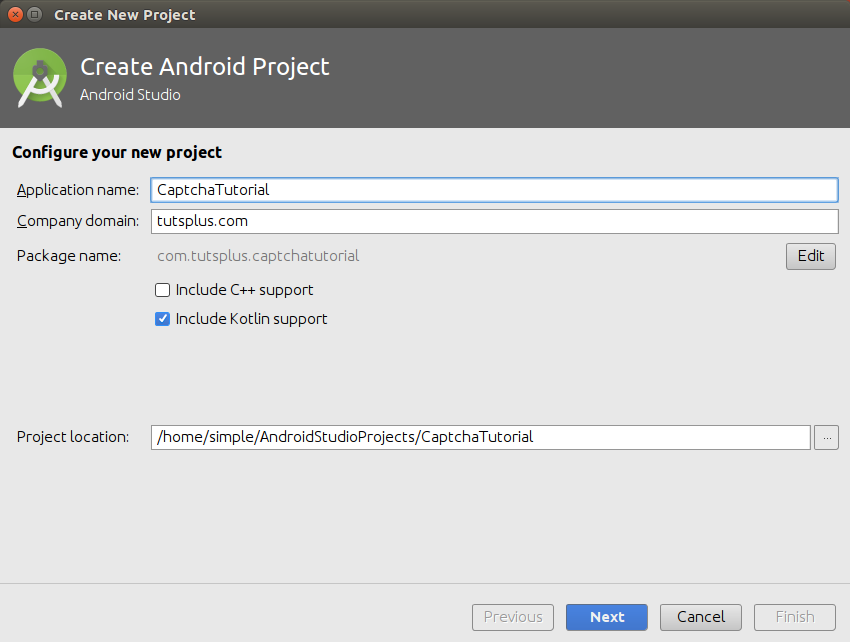
Launch Android Studio and create a new project with an empty activity. In the Configure your new project form, make sure you type in a meaningful package name—you’ll be using it while registering your app with the reCAPTCHA service.
Additionally, check the Include Kotlin Support field. Because Kotlin is now an official Android language, we’ll be using it instead of Java in this tutorial.
SafetyNet APIs are a part of Google Play services. To be able to use them in your project, add the following implementation dependency to the build.gradle file of the app module:
implementation 'com.google.android.gms:play-services-safetynet:11.0.2'
Additionally, to perform network-related operations, we’ll be using the Fuel library, which has a very concise Kotlin-based API. Therefore, add it as another implementation dependency.
implementation 'com.github.kittinunf.fuel:fuel-android:1.8.0'
You can’t perform network-related operations without the INTERNET permission, so add the following line to your project’s manifest file:
Finally, press the Sync Now button to complete the project configuration.
2. Acquiring reCAPTCHA Keys
You’ll need two keys before you can use the reCAPTCHA service:
- a site key, which must be passed to the service from your Android app
- and a secret key, which must be passed to the service from your back-end server
To get the keys, use your Google account and log in to the reCAPTCHA admin console. If you’re opening the console for the first time, you’ll automatically be presented with a short registration form where you can type in your app’s package name.
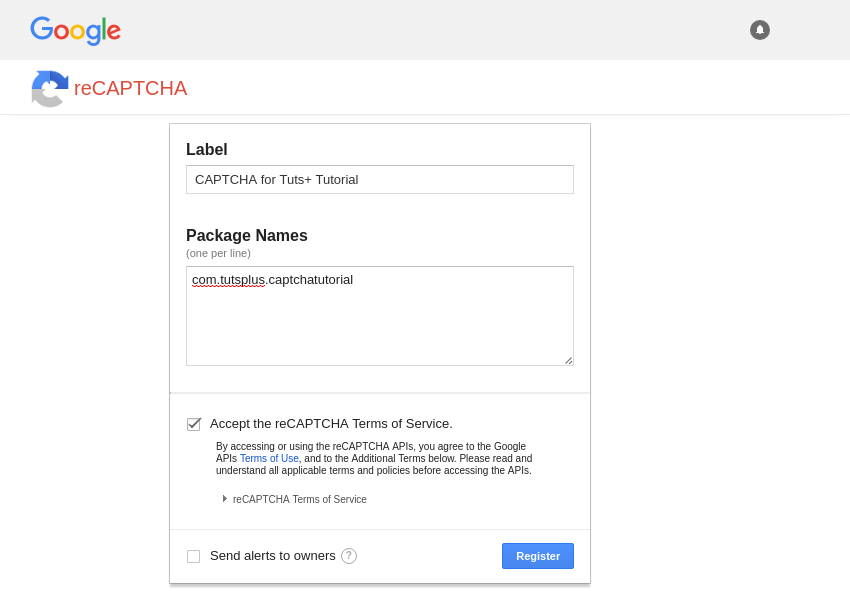
After you accept the reCAPTCHA terms of service, go ahead and press the Register button to generate both the keys.
.png)
You can now add the site key to your Android Studio project by simply mentioning it inside the res/values/strings.xml file:
ABCDEFGHIJKLMNOPQ1234567890
We’ll be working with the secret key only towards the end of this tutorial, so note it down somewhere safe for now.
3. Generating CAPTCHAs
When we hear the word CAPTCHA, we usually think of messy images containing hard-to-read letters and numbers. Such CAPTCHAs, however, thanks to advances in computer vision technologies, are no longer good enough to stop all bots.
CAPTCHAs generated by the reCAPTCHA service are highly advanced, and very interactive too. In fact, solving them is akin to playing simple games. Consequently, you can’t directly embed them in your activity’s layout. Instead, you must add a button to the layout, which, when pressed, should lead the user to a new screen or dialog containing the CAPTCHAs.
The following code shows you how to add a Button widget to your activity’s layout XML file:
Before you start generating CAPTCHAs, you’ll have to initialize a client for the SafetyNet API. You can do so by calling the getClient() method of the SafetyNet class. Accordingly, add the following code inside the onCreate() method of your Activity class:
val myClient: SafetyNetClient = SafetyNet.getClient(this)
The CAPTCHAs must be displayed when the user presses the button, so add an on-click event handler to it using the setOnClickListener() method. Inside the handler, all you need to do is call the verifyWithRecaptcha() method and pass your site key as an argument to it in order to open a dialog containing a CAPTCHA.
The return value of the verifyWithRecaptcha() method is a Task object. By attaching an on-success event handler to it, you’ll be able to acquire a RecaptchaTokenResponse object containing a token you can use to tell if the user passed or failed the CAPTCHA. Here’s how:
are_you_human_button.setOnClickListener {
    myClient
    .verifyWithRecaptcha(resources.getString(R.string.my_site_key))
    .addOnSuccessListener { successEvent ->
        val token: String = successEvent.tokenResult

        // More code here
    }
}
4. Validating CAPTCHA Tokens
The token you got in the previous step must again be passed to the reCAPTCHA service to check if the user passed or failed the test. However, this time, the call to the reCAPTCHA service must be made from your back-end server.
The server, of course, won’t have the token unless your Android app sends it to it. Therefore, we must now write code to send tokens from the Android app to the server.
For now, let’s assume that our server has an endpoint called validate, which can accept the token as a query string parameter. I’ll be using 10.0.2.2 as the server’s IP address and 8000 as its port. If you intend to run the server on your own computer and the app on an emulator running on the same computer, you too can use the same IP address.
val serverURL: String = "http://10.0.2.2:8000/validate"
You can now call the httpGet() method offered by the Fuel library to send the token to the server. The method expects a list of query string parameters as its only argument, so I suggest you use the listOf() utility method to create a list containing a single item: the token assigned to a query parameter named user_token.
Because the httpGet() method runs asynchronously, you must call the responseString() method in order to handle its return value. The following code shows you how:
serverURL.httpGet(listOf("user_token" to token))
    .responseString { request, response, result ->
        // More code here
    }
You can see that we now have access to a result object. In case of no errors, it will contain our server’s response as a string.
Let’s assume that our server returns the string “PASS” if the user passes the test, and “FAIL” otherwise. What you actually do when the user passes or fails the test is, of course, up to you. For now, I suggest you simply display appropriate Toast messages. The following code shows you how to do so concisely:
result.fold({ data ->
    if(data.contains("PASS"))
        Toast.makeText(baseContext,
                "You seem to be a human.",
                Toast.LENGTH_LONG).show()
    else
        Toast.makeText(baseContext,
                "You seem to be a bot!",
                Toast.LENGTH_LONG).show()
}, { error ->
    Log.d("ERROR", "Error connecting to the server")
})
At this point, the app is ready. You can go ahead and deploy it to your emulator or device.

5. Creating the Server
We made a lot of assumptions about our web server in earlier steps. It’s now time to create it, making sure that it doesn’t deviate from those assumptions.
A quick and easy way to create a fully functional web server is to use the Node.js platform and the Express.js framework. To create a new Node.js project, make a new directory on your computer and run the npm init command inside it.
mkdir my_web_server
cd my_web_server ; npm init -y
To add the Express framework to the project, you can use the npm install command.
npm install --save express
Additionally, we’ll be needing the Request package to communicate with the reCAPTCHA service. Therefore, install it as another dependency.
npm install --save request
You can now use your favorite code editor to create a new file called index.js and start writing all the required server-side code.
Start by loading both the express and request modules using the require() function and creating a new Express application by calling the express() function.
const express = require('express');
const request = require('request');

const myApp = express();
Our Express application must have an endpoint called validate, which can be accessed using the HTTP GET method. Therefore, create a new route for it using the get() method:
myApp.get('/validate', function(req, resp) {
    // More code here
});
To validate the token generated by the Android app, you must now make a POST request to the reCAPTCHA service. The request must contain your secret key and the token itself. The following code shows you how to build the POST request’s body by extracting the token from the query string:
const postData = {
    secret: '1234567890-abcdefghijklmnopqr',
    response: req.query.user_token
};
To actually make the POST request, you can call the post() method of the request module. Its response is a short JSON document containing a key called success. As you might expect, its value is true only if the user has passed the test.
The following code shows you how to parse the JSON document, extract the success key, and generate the “PASS” and “FAIL” responses our Android app needs:
request.post({
    url: 'https://www.google.com/recaptcha/api/siteverify',
	form: postData
}, function(error, response, body) {
	jsonData = JSON.parse(body); // Parse the JSON document

	if(jsonData.success) { // User passed the test
		resp.send('PASS');
	} else { // User didn't pass the test
		resp.send('FAIL');
	}

});
Lastly, you must call the listen() method of the Express application object to allow it to listen for connections.
myApp.listen(8000);
At this point our web server is ready. To start it, return to the terminal and run the following command:
node index.js
If you run your Android app now, press the button, and successfully solve a CAPTCHA, you should see a Toast message telling you that you are human.

Conclusion
You now know how to use the SafetyNet reCAPTCHA API to secure your Android app and back-end infrastructure against bots. You don’t have to worry about automated signups, screen scrapers, or bot-generated spam any more.
To learn more about the reCAPTCHA API, you can refer to the official documentation.
In the meantime, check out some of our other great posts on Android app development!
 Android SDKHow to Create an Android Chat App Using Firebase
 Android LollipopGetting Started With RecyclerView and CardView on Android
 AndroidHow to Get Started With Push Notifications On Android


