

Developers are constantly striving to make their apps more advanced, but are they actually usable by everybody? For most apps, the answer is no. In order to reach the largest audience, let’s learn about ways to make our apps more accessible.
Following up on the United Nations’ International Day of Persons with Disabilities, let’s take a look at how we can make our iOS apps more accessible.
In this tutorial, we’ll be using AVAudioEngine to transcribe speech and display it to the user as text (just like Siri does on your iPhone).
This tutorial assumes that you are proficient in Swift, and that you are familiar with using Xcode for iOS development.
Project Setup
To follow along, you can either create a new project in Xcode or download the sample project for this app.
If you’re working from a new project, add the following line to the top of your ViewController.swift file so that the Speech API gets imported.
import Speech
Another step that you must take before you start is to make the ViewController() class conform to the SFSpeechRecognizerDelegate.
Once that’s done, you’re ready to begin the tutorial.
1. Asking for Permission
Since Apple takes privacy seriously, it makes sense that they require developers to ask users for permission before using the device microphones, especially since the data is sent to Apple’s servers for analysis.
In the case of speech recognition, permission is required because data is transmitted and temporarily stored on Apple’s servers to increase the accuracy of recognition.— Apple Documentation
In your Xcode project, you’ll need to open your Info.plist file and add two key-value pairs. Here are the keys which you can paste in:
NSMicrophoneUsageDescriptionNSSpeechRecognitionUsageDescription
For the values, you can enter any string which accurately describes the desired permissions and why you’ll need them. This is what it should look like once they’re added:

Now, we’ll need to actually ask the user for permission before we’re able to proceed. To do this, we can simply call a method, conveniently called requestAuthorization().
But before we do that, inside your viewDidLoad() method, add the following line of code:
microphoneButton.isEnabled = false
By default, this will make the button be disabled, so that there is no chance that the user might press the button before the app has a chance to check with the user.
Next, you’ll need to add the following method call:
SFSpeechRecognizer.requestAuthorization { (status) in
    OperationQueue.main.addOperation {
        // Your code goes here
    }
}
Inside the completion handler of this method, we’re receiving the status of the authorization and then setting it to a constant called status. After that, we have an asynchronous call which adds the code inside the block to the main thread (since the button’s state must be changed in the main thread).
Inside of the addOperation block, you’ll need to add the following switch statement to check what the authorization status actually is:
switch status {

  case .authorized: dictationButton.isEnabled = true
    promptLabel.text = "Tap the button to begin dictation..."

  default: dictationButton.isEnabled = false
    promptLabel.text = "Dictation not authorized..."

}
We’re switching on the return value of the authorizationStatus() function. If the action is authorized (status is .authorized), the dictation button is enabled and Tap the button to begin dictation… is displayed. Otherwise, the dictation button is disabled and Dictation not authorized… is displayed.
2. Designing the User Interface
Next, we’ll need to design a user interface to be able to do two things: start or stop the dictation and display the interpreted text. To do this, head to the Main.storyboard file.
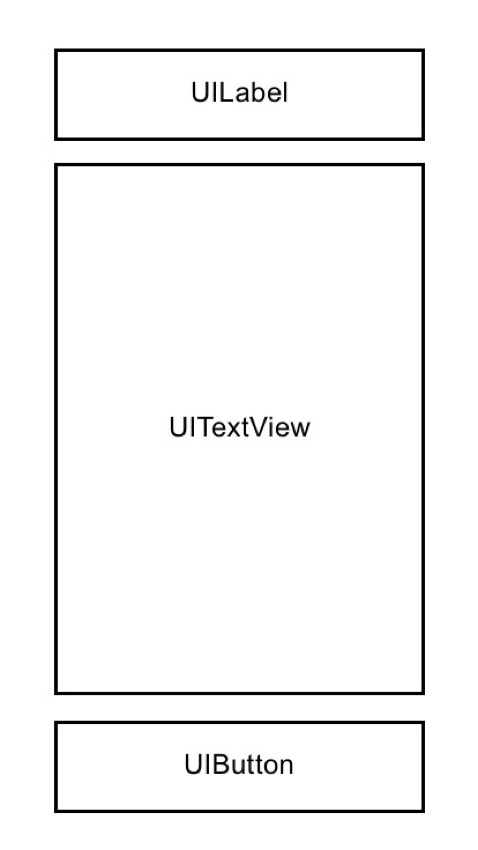
Here are the three interface builder elements you’ll need to continue with this tutorial:
-
UILabel UITextViewUIButton
Since placement isn’t pivotal in this app, I won’t be covering exactly where and how to place everything, so just follow this basic wireframe when placing your user interface elements:
As a reference point, here’s what my storyboard looks like at this point:
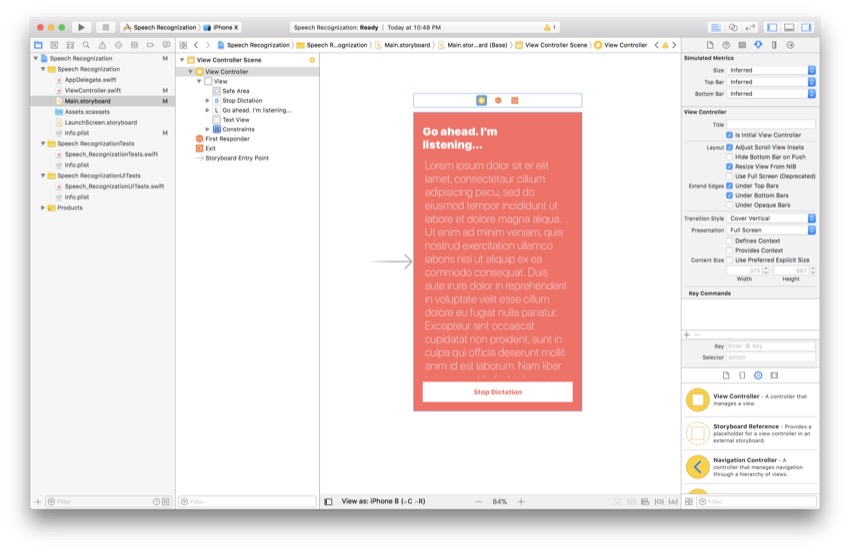
Again, it’s okay if your layout looks different, but just make sure that you have the same three basic elements in the wireframe. Now, paste the following lines of code towards the top of your ViewController() class:
@IBOutlet var promptLabel: UILabel!
@IBOutlet var transcribedTextView: UITextView!
@IBOutlet var dictationButton: UIButton!
Towards the bottom of the ViewController() class, simply add the following function to be triggered when the dictation button is tapped:
@IBAction func dictationButtonTapped() {
    // Your code goes here
}
The last thing left to do is to open the Assistant Editor and connect the interface builder connections to your Main.storyboard file. The dots which appear next to them should now appear filled, and you’ll now be able to access all of these elements as variables and methods, respectively.
3. Adding Variables
Now, we’re finally ready to start speech recognition. The first step is to create the appropriate variables and constants which we’ll be using throughout the process. Below your interface builder outlets, add the following lines of code:
let audioEngine = AVAudioEngine()
let speechRecognizer = SFSpeechRecognizer(locale: Locale(identifier: "en-US"))!

var request: SFSpeechAudioBufferRecognitionRequest?
var task: SFSpeechRecognitionTask?
Here’s a description of what the variables and constants do:
-
audioEngineis an instance of theAVAudioEngine()class. This class is, in simple terms, a series of audio nodes. Audio nodes are used to do various things with audio such as generating and processing it. -
speechRecognizeris an instance of theSFSpeechRecognizer()class. This class doesn’t recognize anything other than the specified language—in this case, US English. -
requestis an optional variable of typeSFSpeechAudioBufferRecognitionRequest, and it is currently being initialized tonil. Later in this tutorial, we’ll actually create one of these and set its value when we need to use it. This will be used to recognize the input data from the microphone of the device. -
taskis another optional variable, this time of typeSFSpeechRecognition. Later, we’ll be using this variable to monitor the progress of our speech recognition.
After you’ve added the variables, you have everything you need to dive right into the speech recognition process.
4. Declaring the Dictation Method
Now, we’ll be making the main method for our speech recognition algorithm. Below the viewDidLoad() method, declare the following function:
func startDictation() {
    // Your code goes here
}
Since we don’t know the current status of the task, we’ll need to cancel the current task, and then, we need to set it back to nil (in case it isn’t already). This can be done by adding the following two lines of code into your method:
task?.cancel()
task = nil
Great! Now we know that there isn’t a task already running. This is an important step when you use variables declared outside the scope of the method. One thing to note is that we’re using optional chaining to call cancel() on task. This is a concise way of writing that we only want to call cancel() if task is not nil.
5. Initializing Variables
Now, we must initialize the variables that we created earlier in this tutorial. To proceed, add these lines of code to your startDictation() method from the previous step:
request = SFSpeechAudioBufferRecognitionRequest()

let audioSession = AVAudioSession.sharedInstance()

let inputNode = audioEngine.inputNode

guard let request = request else { return }
request.shouldReportPartialResults = true

try? audioSession.setCategory(AVAudioSessionCategoryRecord)
try? audioSession.setMode(AVAudioSessionModeMeasurement)
try? audioSession.setActive(true, with: .notifyOthersOnDeactivation)
Let’s break it down. Remember the request variable we created earlier? The first line of code initializes that variable with an instance of the SFSpeechAudioBufferRecognitionRequest class.
Next, we assign the shared audio session instance to a constant called audioSession. The audio session behaves like a middle-man between the app and the device itself (and the audio components).
After that, we set the input node to a singleton called inputNode. To start recording, we’ll later create a tap on this node.
Next, we use a guard to unwrap the request variable which we initialized earlier. This is simply to avoid needing to unwrap this later in the application. Then we’ll enable the display of incomplete results. This works similarly to dictation on the iPhone—if you’ve ever used dictation, you’ll know that the system types out whatever it thinks, and then, using context clues, adjusts things if necessary.
Finally, the last three lines of code attempt to set various attributes of the audio session. These operations can throw errors, so they must be marked with the try? keyword. To save time, we’ll just ignore any errors that occur.
Now we’ve initialized most of the variables that were previously in the nil state. One last variable to initialize is the task variable. We’ll be doing that in the next step.
6. Initializing the Task Variable
The initialization of this variable will require a completion handler. Paste the following code into the bottom of your startDictation() method:
task = speechRecognizer.recognitionTask(with: request, resultHandler: { (result, error) in

    guard let result = result else { return }
    self.transcribedTextView.text = result.bestTranscription.formattedString

    if error != nil || result.isFinal {
        self.audioEngine.stop()
        self.request = nil
        self.task = nil

        inputNode.removeTap(onBus: 0)
    }
})
First, we create a recognitionTask with the request as a parameter. The second parameter is a closure defining the result handler. The result parameter is an instance of SFSpeechRecognitionResult. Inside this completion handler, we need to unwrap the result variable again.
Next, we set the text of our text view to be the best transcription that the algorithm can provide. This isn’t necessarily perfect, but it is what the algorithm thinks best fits what it heard.
Lastly, inside this if statement, we’re first checking if there’s an error, or if the result is finalized. If any of these is true, the audio engine and other related processes will stop, and we’ll remove the tap. Don’t worry, you’ll learn about taps in the next step!
7. Starting the Audio Engine
Finally, the moment you’ve been waiting for! We can finally start the engine we’ve spent so long creating. We’ll do that by installing a “tap”. Add the following code below your task initialization:
let recordingFormat = inputNode.outputFormat(forBus: 0)
inputNode.installTap(onBus: 0, bufferSize: 1024, format: recordingFormat) { (buffer, when) in
    self.request?.append(buffer)
}
In this code, we’re setting the output format of the input node to a constant called recordingFormat. This is used in the next step to install an audio tap on the input node to record and monitor audio. Inside of the completion handler, we’re adding the buffer in a PCM format to the end of the recognition request. To start the engine, just add the following two lines of code:
audioEngine.prepare()
try? audioEngine.start()
This simply prepares and then attempts to start the Audio Engine. Now, we need to call this method from our button, so let’s do that in the next step.
8. Disabling and Enabling the Button
We don’t want the user to be able to activate speech recognition unless it’s available to be used—otherwise, the app may crash. We can do this through a delegate method, so add the following few lines of code below the startDictation() method declaration:
func speechRecognizer(_ speechRecognizer: SFSpeechRecognizer, availabilityDidChange available: Bool) {
    if available {
        dictationButton.isEnabled = true
    } else {
        dictationButton.isEnabled = false
    }
}
This will be called when speech recognizer becomes available after being unavailable or unavailable after being available. Inside it, we’ll simply use an if statement to enable or disable the button based on availability status.
When the button is disabled, the user won’t see anything, but the button won’t respond to taps. This is a sort of safety net to prevent the user from pressing the button too fast.
9. Responding to Button Taps
The last thing that’s left to do is respond when the user taps the button. Here, we can also change what the button says, and tell the user what they need to do. To refresh your memory, here’s the @IBAction we made earlier:
@IBAction func dictationButtonTapped() {
    // Your code goes here
}
Inside of this function, add the following if statement:
if audioEngine.isRunning {
    dictationButton.setTitle("Start Recording", for: .normal)
    promptLabel.text = "Tap the button to dictate..."

    request?.endAudio()
    audioEngine.stop()
} else {
    dictationButton.setTitle("Stop Recording", for: .normal)
    promptLabel.text = "Go ahead. I'm listening..."

    startDictation()
}
If the audio engine is already running, we want to stop the speech recognition and display the appropriate prompt to the user. If it isn’t running, we need to start the recognition and display options for the user to stop the dictation.
Conclusion
That’s it! You’ve created an app which can recognize your voice and transcribe it. This can be used for a variety of applications in order to help users who are unable to interact with your apps in other ways. If you liked this tutorial, be sure to check out the others in this series!
And while you’re here, check out some of our other posts on Swift and iOS app development!
 XcodeWhat’s New in Xcode 9?
 SecuritySecure Coding in Swift 4
 iOS SDKPassing Data Between Controllers in Swift
Powered by WPeMatico


