

Developers are constantly striving to make their apps more advanced, but are they actually usable by everybody? For most apps, the answer is no. In order to reach the largest audience, let’s learn about ways to make our apps more accessible.
To mark the United Nations’ International Day of Persons with Disabilities, let’s take a look at how we can make our iOS apps more accessible.
There are many millions of smartphone users worldwide who have some sort of disability, such as limited vision, partial hearing loss, or difficulty with fine motor control. If you don’t consider the accessibility implications of your app and UI design, you’ll miss the chance for them to benefit from your app.
Apple is committed to making their products available to every user, and has provided developers with a plethora of tools to help make this possible. One of these tools is the Accessibility Inspector, which is used to show the attributes of elements displayed on a screen.
Even though the Accessibility Inspector isn’t a very well-known tool, it is highly useful if you want to make your app as accessible as possible. In this post, I’ll show you how to use Accessibility Inspector to audit the accessibility of your apps.
1. Opening the Accessibility Inspector
To bring up the Accessibility Inspector, first you’ll need to open Xcode. If you have an iPhone, you can use the Accessibility Inspector with it, but for this article, we’ll simply inspect the default apps on a Mac.
Once Xcode has been opened, navigate to Xcode > Open Developer Tool > Accessibility Inspector.
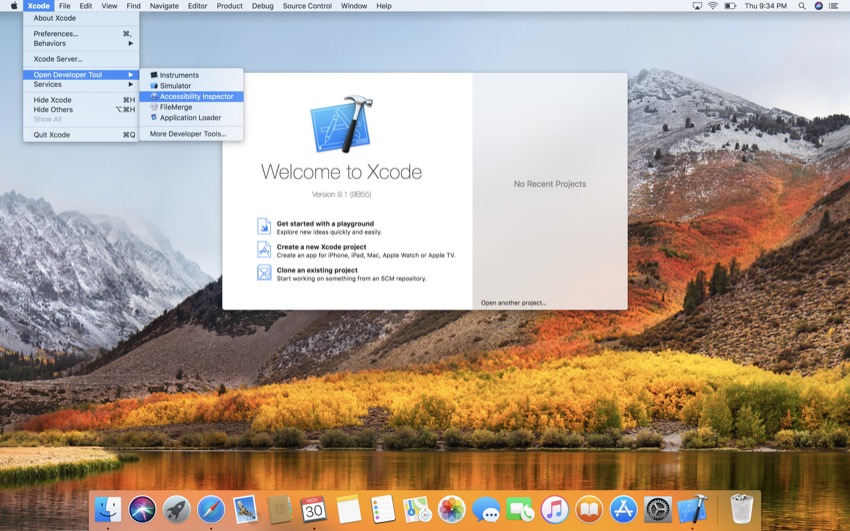
You should see a window pop up which looks something like this:
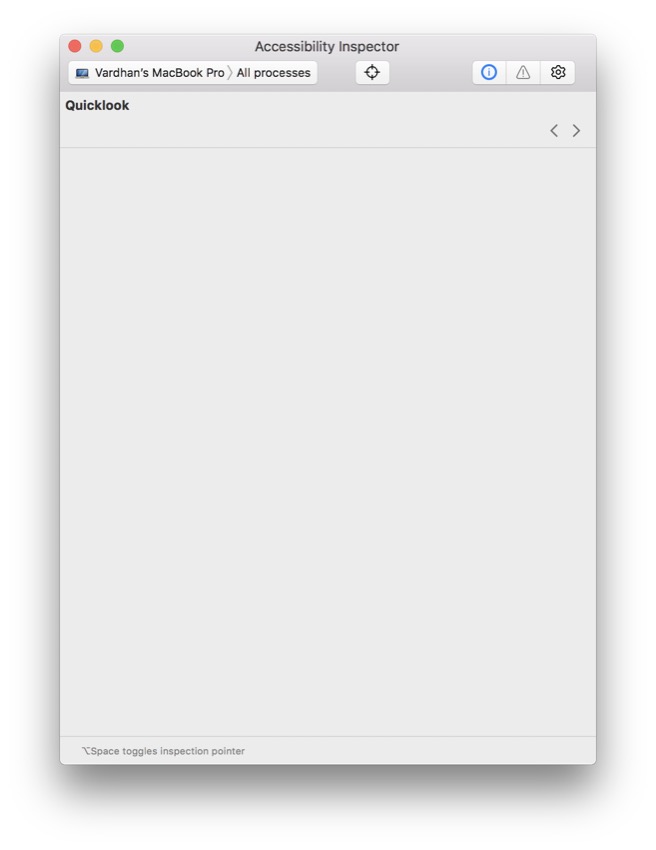
That was easy! In the next steps, we’ll look at how to take advantage of the Accessibility Inspector features.
2. Permissions for Accessibility Inspector
The first step in using the Accessibility Inspector is allowing your Mac to be controlled by it. To authorize this, you must go to System Preferences on your Mac. You can do this by either opening the app from Launchpad or pressing Command-Space on your keyboard and then searching for “System Preferences”.
Once you’ve opened System Preferences, you’ll see something which looks like this:
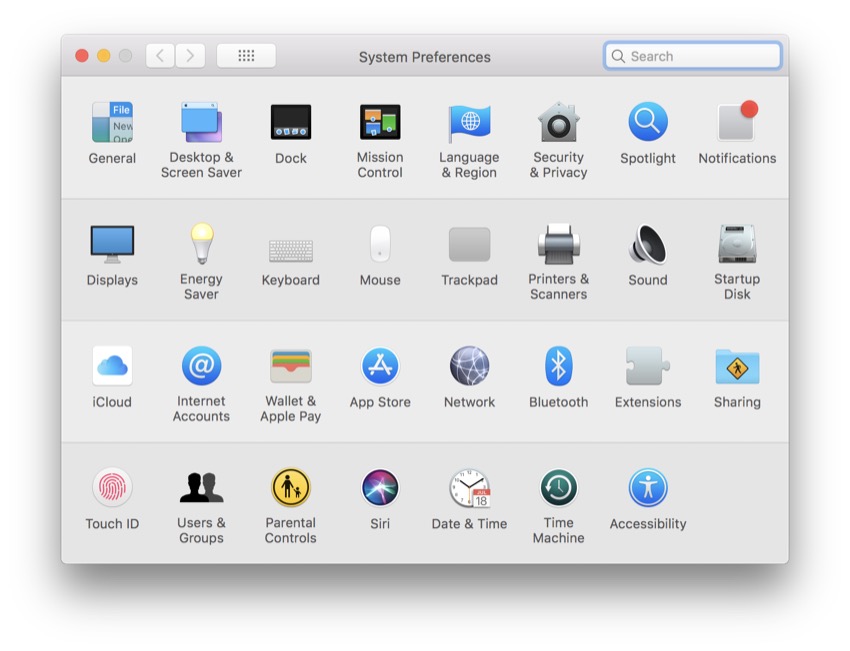
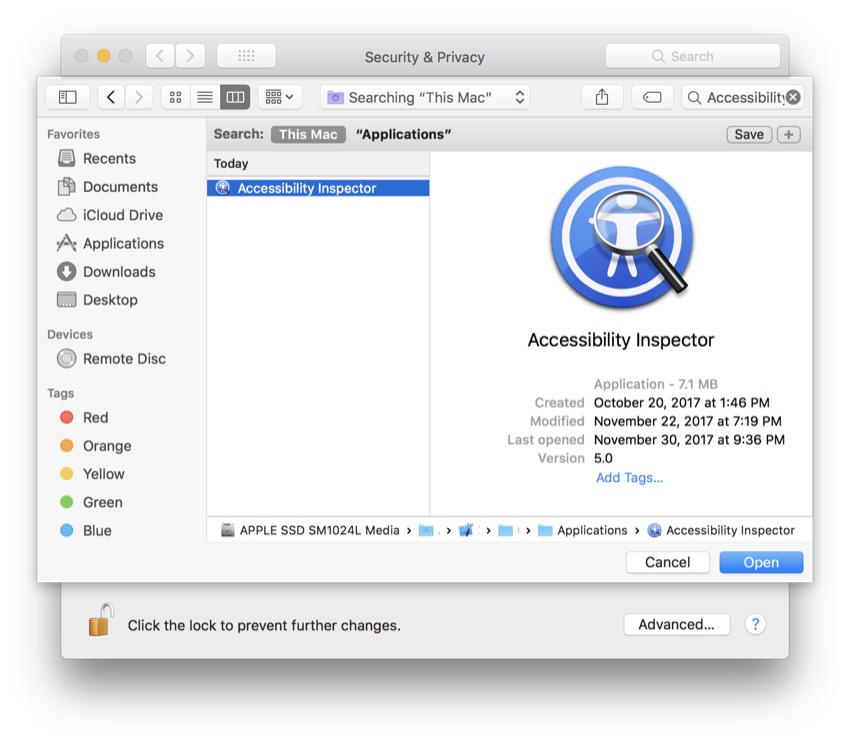
From here, head to Security & Privacy, which you’ll find in the top row. Once you click on it, you’ll see this:
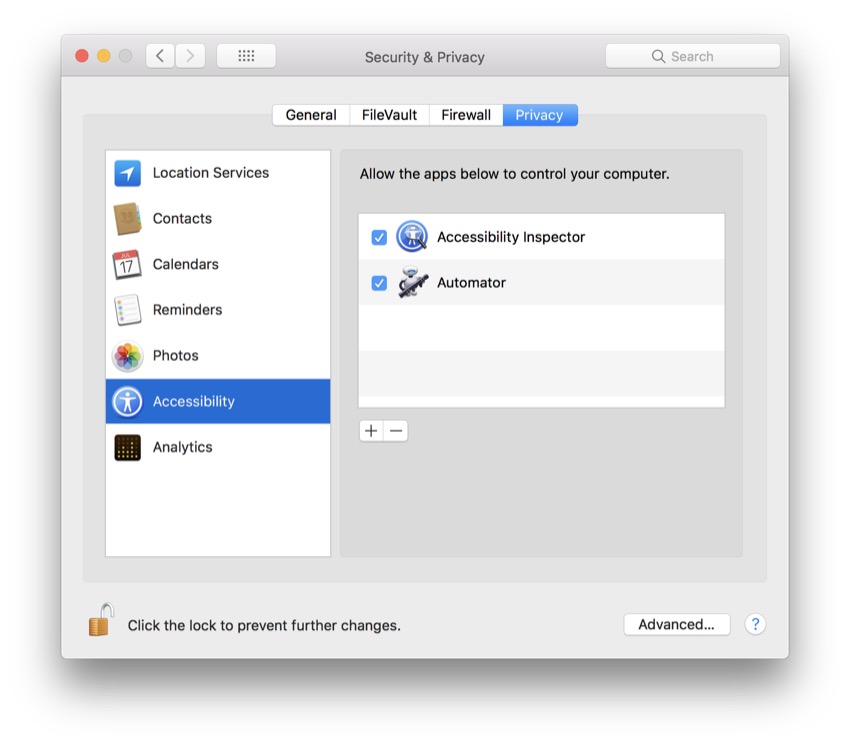
Lastly, go to the Privacy tab and scroll down to Accessibility. You’ll need to add the Accessibility Inspector as one of the apps, so hit the plus button and search for it.
Okay, you’ve now given the Accessibility Inspector full access to your Mac, and you can move on to the next step to learn how to configure different devices.
3. Inspecting Specific Devices
As mentioned in the previous step, you can use the Accessibility Inspector on any device; it isn’t limited to just iPhone or just Mac. So let’s learn how to configure the Accessibility Inspector with various devices.
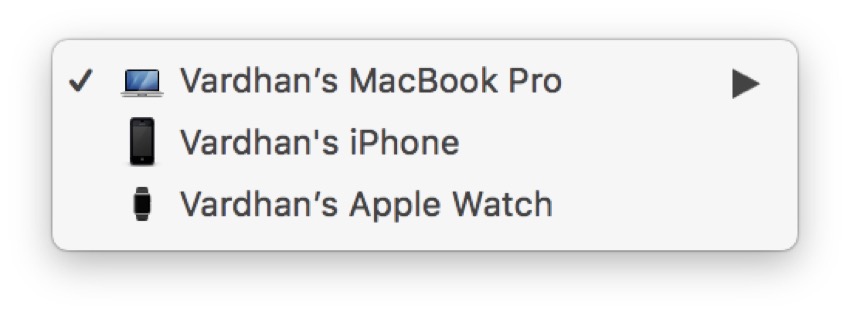
If you’ve used your iPhone with Xcode previously, you should be able to see it in the Target Selector. Usually, by default, your development Mac is selected. If you have an Apple Watch, you may also see it appear in the dropdown.
If you look just to the right of that, you’ll be able to select certain processes from your selected device to inspect. Again, by default, All Processes should be selected. Spend some time and play around with different devices, and when you’re ready, move to the next step, where we’ll learn how to use the Inspection Pointer tool.
4. Using the Inspection Pointer
The biggest part of the Accessibility Inspector is the Inspection Pointer. This useful tool is able to give meaningful information about a certain user interface element. Locate the icon which looks like a target, just right of the center of the menu bar (it’s between the Target Selector and the Inspection Detail icons).
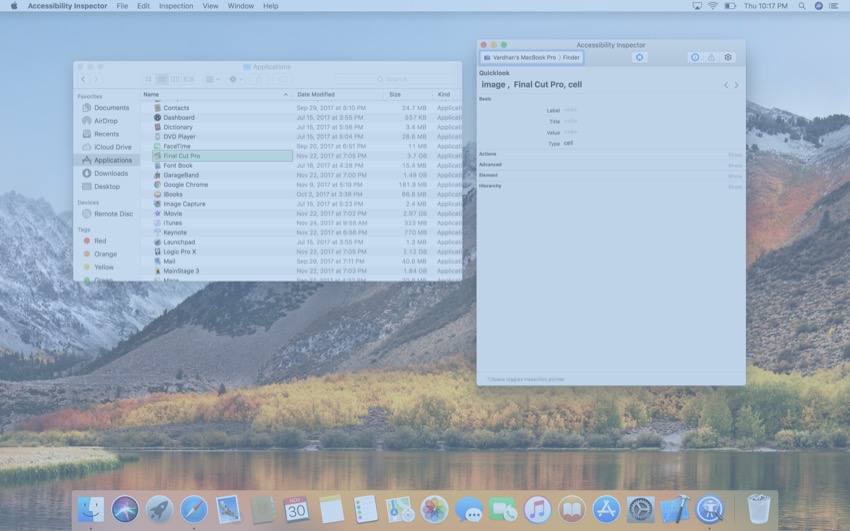
As I mentioned earlier, we’ll be using the stock apps on our development Mac to use this tool, so make sure your development Mac is selected along with the Finder in the Target Selector. Tap the Inspection Pointer icon so that it turns blue, and now you’re ready to start inspecting.
If you look at my Finder below, you’ll see that what I have pointed to is highlighted in green, and you can see some basic information.
Also, if you look closer at the Advanced tab, you’ll be able to change certain attributes of the selected element. In the next step, you’ll learn how to audit the accessibility of apps.
5. Auditing Accessibility
Before ending this tutorial, I would like to introduce you to auditing your apps for accessibility. Even though you might not be able to see some issues that people may have using your app, the Accessibility Inspector has your back.
Take a moment to locate the Audit icon in the toolbar. This is where you’ll be able to see specific issues with the selected process on your chosen device. To begin, you’ll need to reselect your scheme and device (just as you did in the previous step), but this time you simply tap the Audit icon and click on the Run Audit button which appears.
Your Accessibility Inspector should return with all of the warnings and accessibility errors your program has. For example, if you don’t provide a good description for one of the images in your app, you may see something like “Image name used in description“. Then you can tap on the arrow to expand that warning and find more information about it. You can also tap the Eye icon next to an issue, and Accessibility Inspector will show you a screen capture with the issue highlighted.
Here’s what Accessibility Inspector returned when I audited macOS’s Finder:
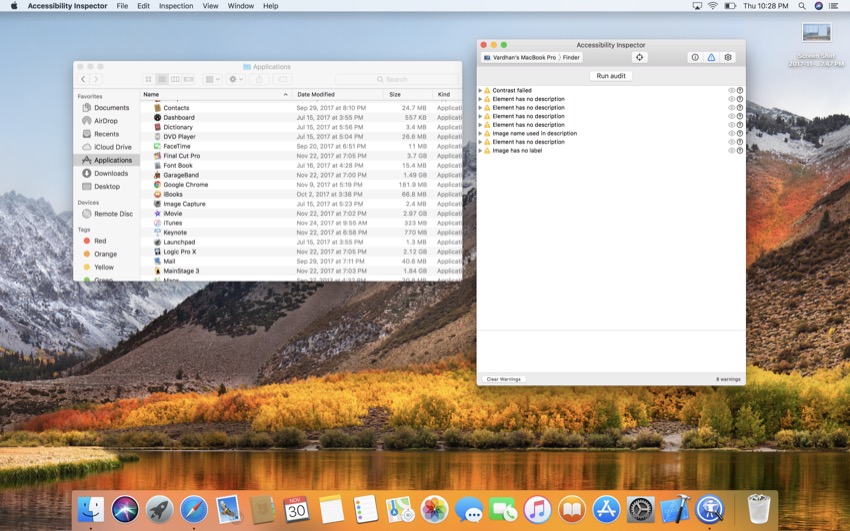
As you can see, even Apple has some work to do to ensure their apps are accessible!
Conclusion
You may have never heard of the Accessibility Inspector, but it is a very powerful tool which can help you distinguish your apps from others. Using this tool, you can make your app more accessible and usable by more people. If you liked this article, stay tuned—I’ll be writing more about ways to make your app accessible in the coming week.
And while you’re here, check out some of our other posts on iOS app development!
 XcodeWhat’s New in Xcode 9?
 SecuritySecure Coding in Swift 4
 iOS SDKPassing Data Between Controllers in Swift
Powered by WPeMatico


