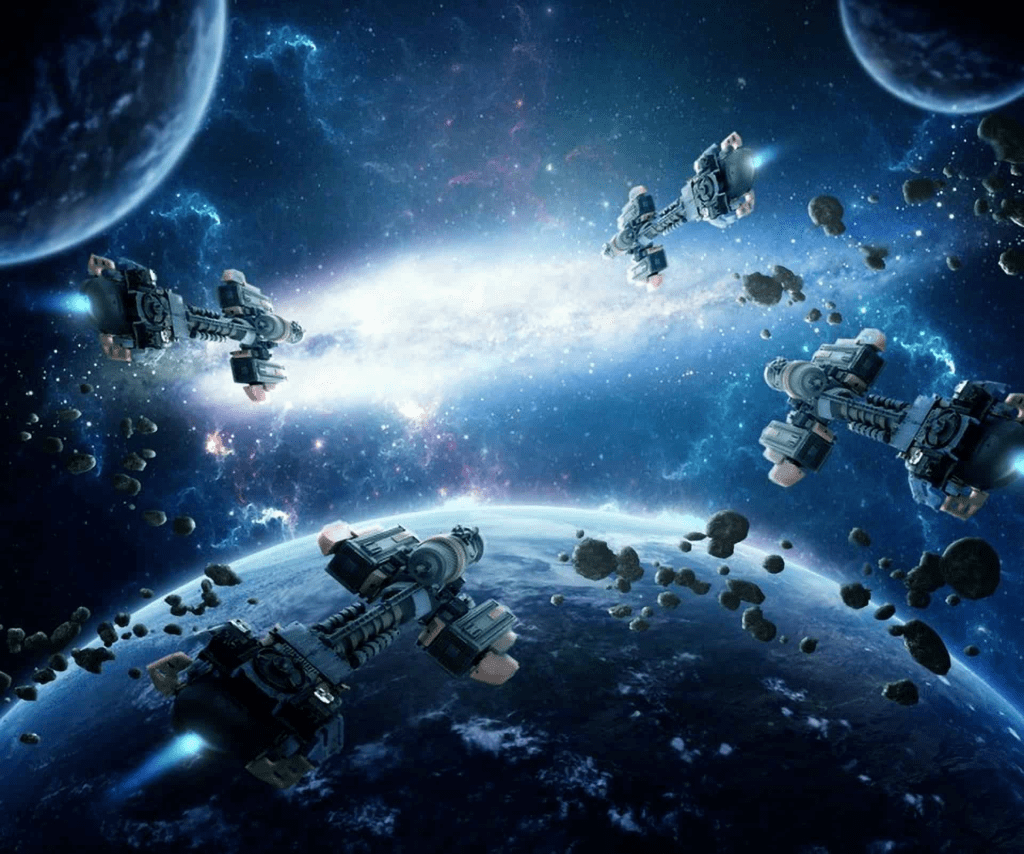
Are you ready to embark on a creative journey? This Photoshop space scene tutorial will guide you through the mesmerizing process of creating a vibrant cosmic masterpiece with stunning neon light effects. With easy-to-follow steps, we will explore how to composite various space-themed graphics into a surreal dreamscape that bursts with color. By utilizing a cool duotone color scheme, you’ll learn to transform ordinary images into extraordinary cosmic artwork that captivates the imagination. Join me as we delve into this graphic design resource and unlock the potential of photo compositing, creating a stunning visual that shines with every pixel.
Dive into the world of digital artistry with our guide on crafting celestial scenes in Photoshop. In this tutorial, we will harness the power of photo manipulation techniques to assemble mesmerizing images of the universe, perfectly showcasing the ethereal beauty of space. Expect to explore exciting effects, such as neon lighting and duotone palettes, which will elevate your designs to new heights. Whether you’re a seasoned graphic designer or just starting out, you’ll find valuable insights and creative inspiration here. Let’s unpack the secrets behind making striking cosmic illustrations that are sure to inspire a sense of wonder.
Getting Started with Photoshop Space Scene Tutorial
In this Photoshop space scene tutorial, we will dive deep into the world of cosmic artwork creation. The first step involves setting up your canvas and gathering all necessary assets from the Ultimate Universe Creator sample pack. This unique set contains rich graphical elements tailored for outer space compositions, which you can download for free. By utilizing high-quality images and elements, you ensure that your final artwork truly pops with a vibrant and surreal aesthetic.
To kick things off, open your Photoshop and create a new document. Set your preferred dimensions and resolution, ideally 300 DPI, to guarantee print-quality work. Begin by importing your collected assets. You can easily blend these components using layer masks, ensuring that each graphic fits harmoniously within the space context. This process will lay the groundwork for a stunning photo composite that captures the essence of a vast and dynamic universe.
Creating Surreal Cosmic Artwork
Creating cosmic artwork is an exciting journey that allows you to explore your creativity. In this section, we will focus on the importance of layering different graphics and effects to build depth in your space scene. Use elements such as planets, stars, and colorful nebulae to create a rich backdrop. Start with a dark background to simulate the void of space, then strategically place your assets. Remember, the goal is to create a sense of depth and realism, so pay close attention to how each layer interacts.
Next, we will apply effects to enhance the surreal quality of your cosmic artwork. Using the neon light effect in Photoshop can greatly contribute to this ambiance. Experiment with layer styles and blending options, such as Outer Glow and Inner Glow, to give your graphics a vibrant luminescence. This technique not only adds a striking visual appeal but also ties the elements together, creating a cohesive look that draws the viewer’s eye throughout the composition.
Mastering the Duotone Color Scheme
A duotone color scheme can elevate your space scene and provide a modern twist to your artwork. By limiting your color palette to two contrasting hues, you create a strong visual impact while maintaining a harmonious design. To achieve this effect, select two colors that complement each other—typically a dark tone combined with a vibrant neon shade works well for cosmic themes. This approach not only enhances the overall aesthetic but also ensures your design resonates with contemporary graphic trends.
Implementing a duotone scheme requires adjusting the colors of your imported assets. You can create duotone effects by using adjustment layers in Photoshop, allowing for non-destructive editing. This way, you can fine-tune your palette until it perfectly embodies the vibe you’re aiming for. By applying this technique across your entire piece, you draw on graphic design principles that highlight the importance of color harmony and composition.
Utilizing Graphic Design Resources Effectively
When embarking on your Photoshop project, utilizing the right graphic design resources is crucial to achieving professional-quality results. The Ultimate Universe Creator sample pack is an excellent starting point, but it’s essential to expand your toolkit with other assets. Websites offering free textures, brushes, and overlays can significantly enhance your creative process. Make sure to explore various design resources that align with your project goals—these tools can be the key to unlocking your artwork’s full potential.
In addition to free assets, look for premium resources that provide high-resolution images and unique graphics. Subscribing to design newsletters and online communities can keep you updated on the latest trends and tools in the industry. By staying connected to current graphic design resources, you empower yourself to push boundaries and explore innovative techniques in your projects, ultimately refining your skills and producing stunning artwork.
Tips for Perfect Layering in Photo Compositing
Layering is fundamental in photo compositing and plays a significant role in the overall outcome of your artwork. Start your tutorial by understanding the hierarchy of layers in Photoshop. Group similar elements together, adjusting their opacity to create depth and realism. Utilize blending modes to achieve unique effects that blur the lines of realism and fantasy. When layering images, remember that the placement can affect the composition’s flow, so pay attention to how each element interacts with the space around it.
To enhance your layered space scene, consider using layer masks strategically. They allow for greater accuracy when blending elements without permanently altering your images. For instance, if you want to incorporate a planet into the scene, apply a layer mask and gradually reveal parts of it to create a seamless integration with the surrounding stars and cosmic dust. Mastering the art of layering is essential for transforming a basic composite into a captivating visual narrative.
Exploring Neon Light Effects for a Futuristic Appeal
Embracing neon light effects can take your Photoshop space scene to the next level, infusing it with a futuristic and vibrant appeal. The technique involves using bright colors against darker backgrounds to create striking contrasts that mimic the glow of neon lights. To implement this effect, apply the Outer Glow layer style to select elements in your composition. This technique not only emphasizes the features but also introduces a sense of dynamism that is characteristic of modern graphic design.
Experiment with different blending modes and opacities to achieve the desired intensity of the neon effect. Colors like electric blue, vibrant pink, or bright green can evoke a cosmic energy that engages viewers. Additionally, consider using geometric shapes around your items to emphasize the neon vibe, making your graphics appear as if they’re radiating light in a bustling digital universe. This effect can turn ordinary space scenes into extraordinary visual experiences.
Combining Elements for a Compelling Visual Experience
Combining various design elements effectively can lead to a compelling visual experience in your space scenes. Start by ensuring that each element you choose adds value to your composition, contributing to the overall theme you’re creating. Whether it’s planets, stars, or ethereal backgrounds, thoughtful selection and placement can make a significant difference. Remember that it’s not just about how many elements you include, but how well they work together to tell a cohesive story.
Utilize contrast and color harmony when combining elements in your layout. A successful space scene will often feature varying scales of objects, enhancing the perception of depth and distance. Consider incorporating smaller, more subdued graphics in the foreground while larger, more vivid elements recede into the background. This technique creates a layered effect that adds intrigue, guiding the viewer’s eye through the entirety of your artwork while emphasizing the vastness of space.
Final Touches to Enhance Your Cosmic Artwork
Once your space scene takes shape, it’s time for final touches that can enhance its visual appeal. This phase may include adjusting the overall color balance to ensure your duotone scheme is vibrant yet harmonious. Utilizing adjustment layers allows for greater flexibility in fine-tuning the color dynamics and enhancing the glow effects of your neon lights. Additionally, consider adding subtle textures or grain to mimic the organic feel of space, providing an additional layer of depth.
Another aspect to consider in your final touches is the addition of small details that can elevate your design. This could include shooting stars, distant planets, or even abstract patterns that flow throughout the scene. These elements, while minor, can add interest and texture, inviting viewers to explore the various facets of your artwork. Finishing strong ensures that your cosmic piece not only looks professional but also leaves a lasting impression.
Using Feedback and Iteration to Improve Your Design
Feedback is an invaluable resource for any designer looking to improve their work. Once your space scene is complete, consider sharing it within design communities or with fellow creatives to garner constructive criticism. Engaging with others can provide fresh perspectives on your artwork. Often, feedback can reveal details you might have overlooked or spark new ideas that enhance your design further.
Iteration is key in the design process. Don’t hesitate to revisit your artwork after receiving feedback. Make adjustments based on the insights you gained and refine your composition. This might mean altering the layout, enhancing the neon light effects, or even swapping out colors in your duotone scheme. Embrace the evolution of your artwork as a positive step toward mastering your craft.
Frequently Asked Questions
What tools are necessary for the Photoshop space scene tutorial?
To effectively follow the Photoshop space scene tutorial, you’ll need Adobe Photoshop, access to the Ultimate Universe Creator sample pack, and the Duotone gradient presets. These tools will help you create vibrant cosmic artwork with neon light effects.
Where can I find the assets for the Photoshop space scene tutorial?
You can download the necessary assets for the Photoshop space scene tutorial from the Ultimate Universe Creator sample pack, which is available exclusively for Spoon Graphics viewers. This pack contains various graphics that will enhance your composition.
How do I apply a duotone color scheme in the Photoshop space scene tutorial?
To apply a duotone color scheme in the Photoshop space scene tutorial, first download my free Duotone gradient presets. Then, simply load them into Photoshop and apply them to your layers to achieve the desired futuristic look in your cosmic artwork.
Can I use the neon light effect in Photoshop for other projects?
Absolutely! The neon light effect demonstrated in the Photoshop space scene tutorial can be applied to various graphic design projects. Just follow the steps in the tutorial to understand how to create this effect, and then you can adapt it for other designs.
Is the Photoshop space scene tutorial suitable for beginners?
Yes, the Photoshop space scene tutorial is designed to be beginner-friendly. I will guide you through each step of the photo compositing process, making it easy to create stunning cosmic artwork, even if you are new to graphic design.
What is the focus of the Photoshop space scene tutorial?
The main focus of the Photoshop space scene tutorial is to teach you how to create a surreal space scene using photo compositing techniques. You’ll learn to apply vibrant neon light effects, a duotone color scheme, and abstract geometric shapes to enhance your graphic design projects.
Are there any graphic design resources included in the tutorial?
Yes! The Photoshop space scene tutorial includes links to several graphic design resources, such as the Ultimate Universe Creator sample pack and free Duotone gradient presets, which you can use to create your cosmic artwork.
| Key Point | Detail |
|---|---|
| Tutorial Focus | Creating a surreal space scene in Photoshop with a neon light effect. |
| Assets Used | Includes a free sample pack from the Ultimate Universe Creator. |
| Technique Highlights | Using a duotone color scheme and geometric shapes for a cool, abstract effect. |
| Additional Resources | Links to free gradient presets and font activation. |
| Community Engagement | Comments section for viewer feedback and interaction. |
| Next Content | Future tutorial on designing a retro VHS cover poster using Illustrator. |
Summary
The Photoshop space scene tutorial aims to guide users through the process of creating an imaginative cosmic artwork filled with vibrant colors and abstract designs. Adopting a duotone color scheme and neon geometric elements, this tutorial utilizes free resources that enhance the learning experience. By following along, you can develop your skills in photo compositing while engaging with a community of fellow creatives looking to bring their artistic visions to life.


